Showing posts with label Food. Show all posts

Friday, November 19, 2010

Knitting, knitting, knitting.

Hello, internet! It's been an embarrassingly long time. This could be due to the exciting fact that I am no longer unemployed! In fact, I now have two jobs. One is a not-very-exciting seasonal position at a major retail store, the other is a much more exciting permanent position at a yarn shop! Three exclamation points in five sentences, can you tell I'm excited about this? In addition to getting to sit around and knit for most of the day, and having an awesome discount, I'm learning a lot about yarn and knitting techniques. I can take any class I want for free (education to better help customers), and I get to meet a lot of cool ladies. Luckily, the fact that I now work at a knitting shop hasn't at all slowed down my craft productivity. Here are some things I've been working on:


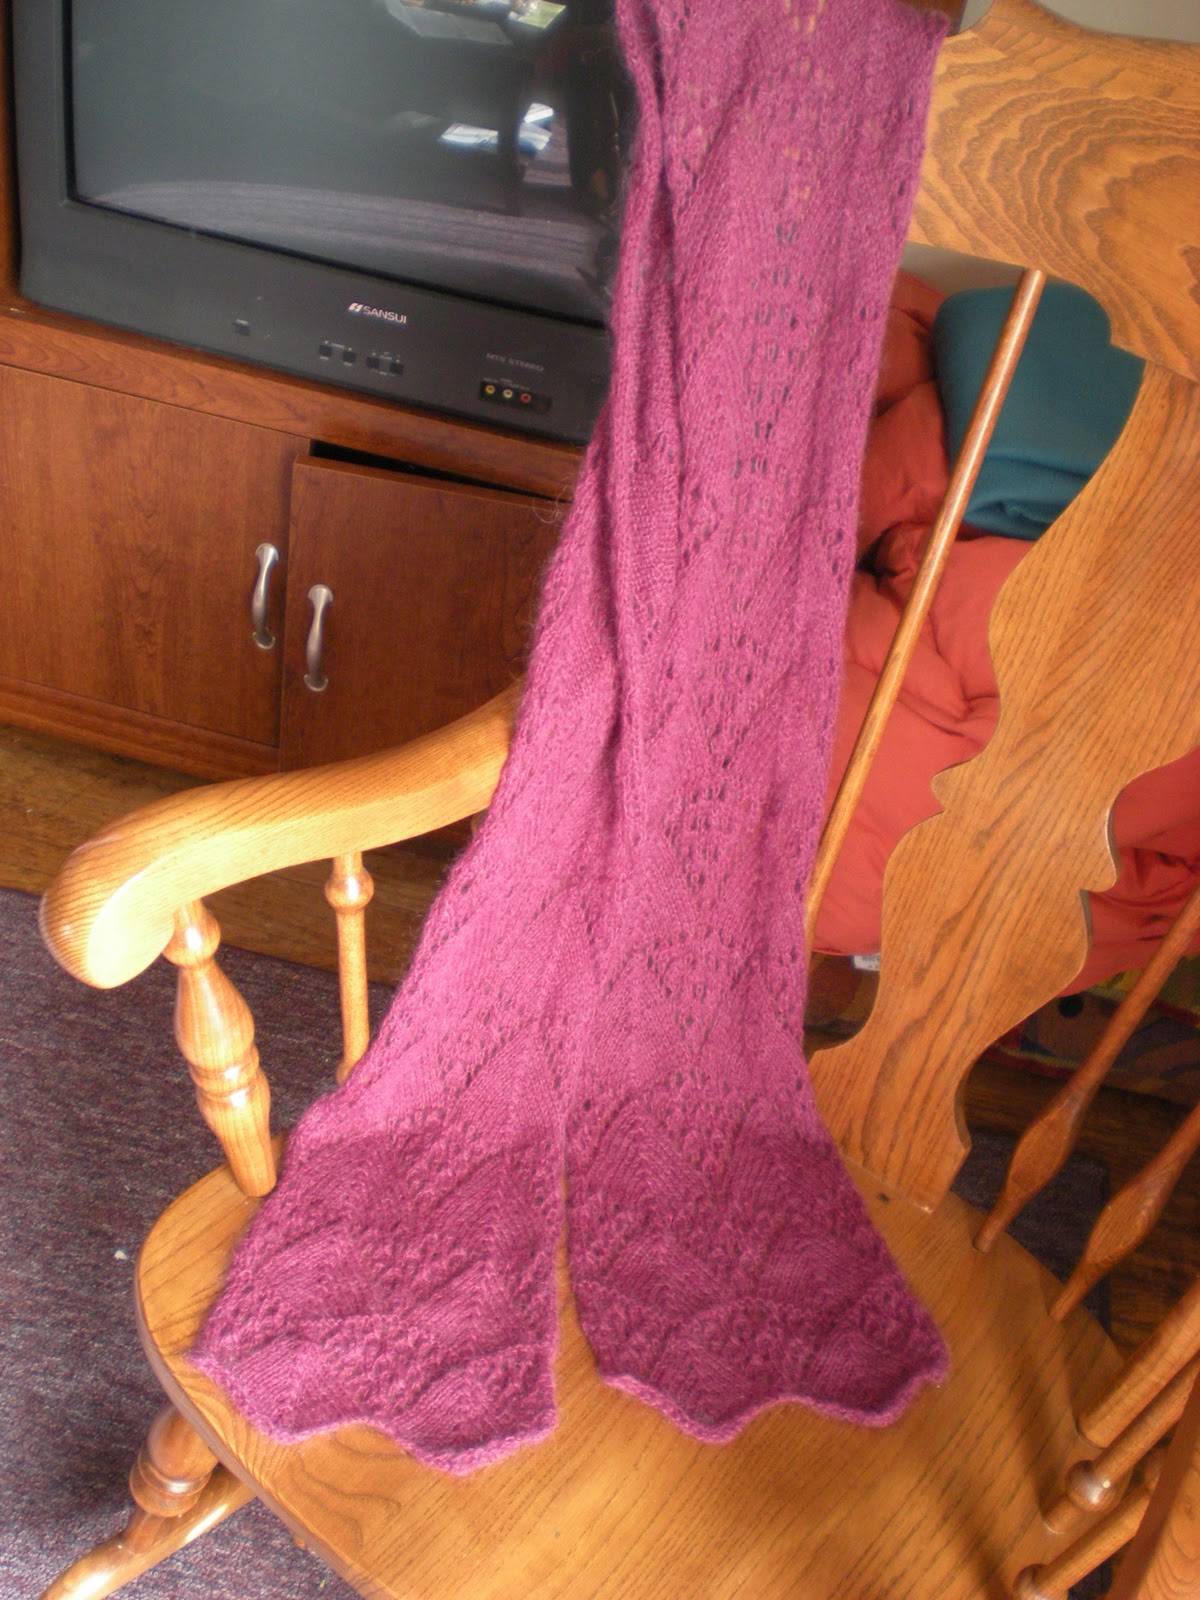
I had this project on needles for FOREVER. Seriously, like a year and a half. I started it when I went to France for a semester, as I knew there would be lots of train time to work on something. After setting it down and picking it up I don't even know how many times, I finally got the big push to finish it when my now-boss called me up to schedule an interview at the shop, and requested that I bring a couple pieces to show off my knitting skillz. Since I didn't really have any of my finished products available, I got to knitting and finished two projects, this one and a gray wrap/scarf:


With these two projects I was deemed worthy to work at the yarn shop, and started the following week. Being surrounded by yarn and beautiful knit things all day has only inspired me to come up with project after project. It seems like for every project I start, I find five more that I want to do. My favorite so far has been these cabled fingerless mitts:


Though they may look complicated, they were surprisingly easy, with just enough detail to keep me interested. Currently I'm working on a hat for Eric, which has detachable ear flaps, a knit version of my magic deck pouches and a shorter pair of lacy fingerless gloves. I've got countless projects on my mental list, including both stuff for myself and Christmas gifts. I should really get going on the latter! Good thing I get two days a week at the yarn shop to keep me focused...

In other news, I've been able to keep up the domesticity, despite my new jobs. I won an epic battle against fruit flies at my place, and another one against laundry at Eric's. Both of our places are relatively clean at the moment, I'm proud to say. And we've been cooking! The other night we made two things, an awesome curried lentil and spinach soup and a surprisingly easy cornbread, all from scratch! I am still amazed every time I make something from scratch that I used to know as only coming from a box; it's never that much more difficult and almost always tastes better.

I have also acquired a frozen turkey (apparently turkey bowling is a common pastime for those in the retail business during the busy season), which I have yet to find a purpose for. I'm caught between donating it and attempting to cook it myself, as both have the potential to be rewarding experiences. I would also love an excuse to take a stab at my great-grandmother's stuffing recipe, as I will sadly be missing it this year. An unfortunate side effect of working retail around Thanksgiving is that you're pretty much required to work Black Friday, despite any plans your family may have made to roadtrip it to Chicago for a big family gathering. Oh, well. There's always Eric's Thanksgiving to crash.

Wednesday, October 13, 2010

Apple Pie

Apparently I'm not entering my accomplishments chronologically, as I've finished several projects in the last few weeks. However, this is the one that I'm most excited about.

I baked an apple pie. From scratch. Well, mostly from scratch.

Here's how it went down. Eric (my boy) and I decided to go apple-picking at this place about forty five minutes away from where we live. It was just a tiny little apple farm that, interestingly, also had alpacas. When we  arrived, the nice lady who greeted us handed us a large bucket and a plastic bag and lead us to a golf cart, apparently a necessary mode of transportation to travel the 300 feet into the orchard. The apples left were relatively small, so we just picked a bunch of them. And ended up with nine pounds of apples. Nine. Here's what that looks like, after we took out about eight or nine for the pie:


What to do with the rest of them, I still haven't figured out. But I'd be damned if we weren't going to make an apple pie. A quick Google search lead me to this page, a five-star apple pie recipe with 1,061 reviews and 23,197 people who had saved it. Sounded like a pretty good deal, so I decided to give it a try.


We began by peeling and slicing up the apples. Assembly-line style, we were able to get this done pretty quick. We put them into a bowl with a tiny bit of lemon juice, to keep them from browning.


Next I started to simmer up the butter, flour, sugar, and brown sugar concoction as per directed by the recipe. Always my mother's child, I added a tablespoon of vanilla. Eric also had the brilliant idea of adding some Fee's Brother's Bitters to the sauce. It's something we use quite a bit in cocktails, but never before in cooking. After he gave me an apple slice with a bit of the bitters on it, I was sold. I may start using that as an alternative to peanut butter when I eat apples. To the apples, I added cinnamon and nutmeg, a suggestion made by many reviewers of the recipe.

For the pie crust, we used a pre-made Pillsbury refrigerated crust. Next time I may try my own, but for my first attempt at any sort of pie, I thought that it may be better to simplify. After carefully unrolling one crust into the pie pan, in went the apples in their cinnamon and nutmeg-y goodness.


Next came the part that I was dreading the most: the lattice crust. About half of the reviews on this recipe  had decided to forgo it, something I was tempted to do myself. However, one review I read said something to the tune of "DO NOT SKIP IT IT IS ABSOLUTELY NECESSARY AND NOT THAT HARD", so I decided to give it a go.

Step 1: roll out the crust and cut it into 1" strips.


So far, so good.

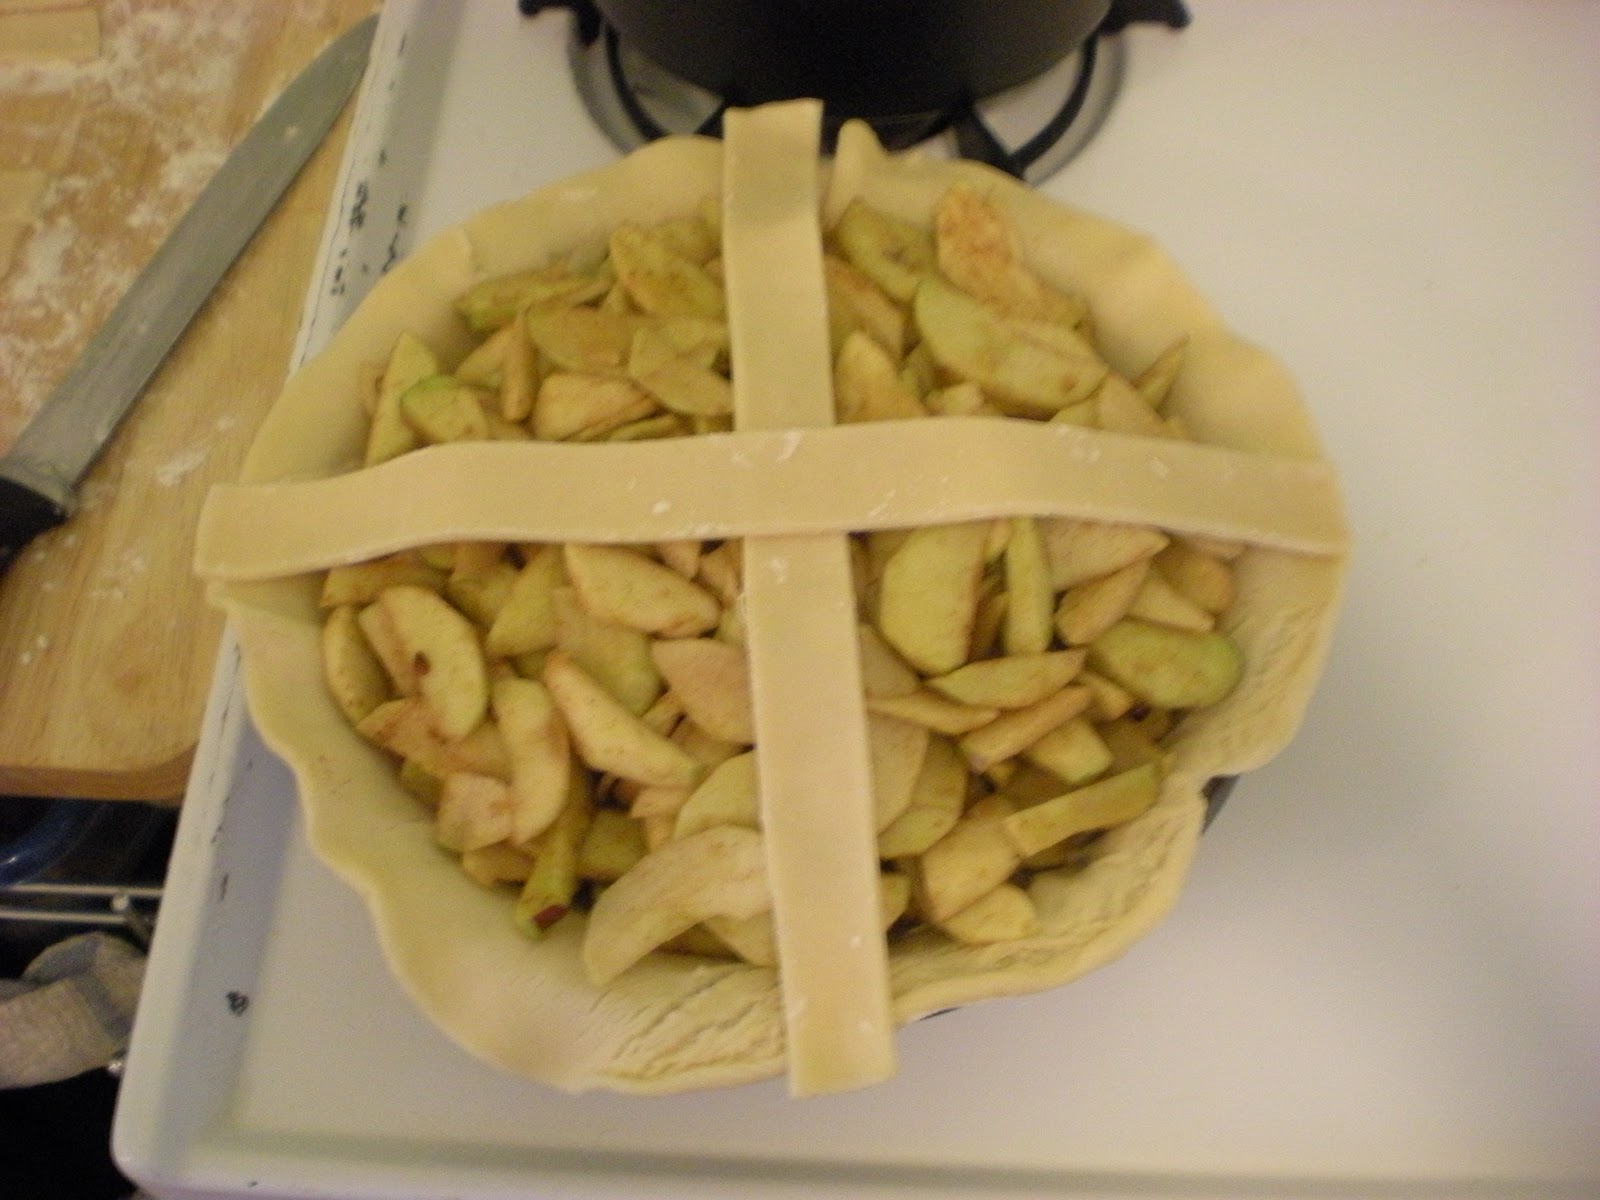
Step 2: Take the two longest strips and place them in a 90 degree cross over the pie.


Step 3: add the rest of the pieces one at a time, weaving them in an over-under fashion, making sure to leave sizeable holes of visible apples.


And there it is. When I finished this I was amazed. Weaving. It's not that hard.

Next I poured the butter-sugar-vanilla concoction over the pie, which left a delicious-looking glaze on the crust. The next time I do this, though, I think I'll seal up the edges of the pie crust first, so that the sauce doesn't go running down the strips of pie crust and onto Eric's nice clean stove.


After rolling up the edge of the pie crust, this baby was ready to go into the oven. 425 degrees for 15 minutes to bake the crust, then 350 degrees for 35-45 minutes. This would have been a good time to clean up the huge mess I had just made, but I decided to go outside and play with Richard the cat instead.


Despite how angry he looks in the photo, he's a sweetie.

After about 45 minutes of playing with cats and resisting the urge to peek into the oven every five minutes to see how my precious baby was coming along, out came the pie!


I'll be darned, it looks like a real pie. After taking it out I was glad that I had decided to heed the advice of the more seasoned piebakers on Allrecipes and put a baking sheet underneath the pie, because man, did that sauce go everywhere during the baking process. It also left a nice, shiny, sugary glaze on the crust, as that particularly adamant reviewer had promised. But just because it looks pretty don't mean it's pie. I'm thankful that we had to leave immediately to go to a concert, because otherwise I may have ended up cutting into it before the filling had a chance to set!

Upon our return later that night I went straight for the pie. We heated it up and served it with ice cream (chocolate chip, as there was no vanilla to be found).

Oh. My. God. Not only was it actually apple pie, it was the best apple pie I've ever tasted. Now, I may be a little biased, but trust me when I say that it's pretty darn good. Saying that I was proud of myself for accomplishing this task would be quite the understatement. I think I spent the rest of the night with a ridiculous grin on my face, repeatedly informing Eric, "I made pie!" I can't think of a single change I would make to this recipe, it was perfect.

Now we just have to figure out what to do with the rest of those apples...

Thursday, September 23, 2010

Mmm, Granola

When we were living together, my roommate would make granola at least once a month. At first I didn't care for it too much (it wasn't nearly as tasty as the uber-processed chocolate peanut butter Chewy bars that I was used to), but over time, it grew on me. Since I get hungry every three or so hours, it was a great snack to take along when I had huge blocks of class, or when I woke up late and couldn't eat breakfast. I've been dreaming about it for awhile now, so when a friend passed on this super tasty granola recipe I decided to give it a try.


Never having made granola before, I must say that this turned out to be really friggin' delicious. Perhaps even better than my roommate's version. Since it calls for molasses, my kitchen ended up smelling more like my mom's ginger bread men than granola, which was a pleasant surprise. I made a few changes. I went against the author's advice and made a half-batch, being that I am only one person and it was the first time I was making the recipe. I also don't have three baking sheets. Or even three shelves in my oven. Didn't add the flax seeds, but neither did my friend (or the author of the recipe, for that matter). I decided to double the vanilla, a habit I've inherited from my mother, no doubt. And I threw in some sunflower nuts that I found at my grocery store for super cheap.


Now, I'm a firm believer that most anything that comes out of the oven tastes best when eaten right away (allotting some time for cooling to a reasonable temperature, of course). The recipe cautions to leave it alone until it's fully cooled. Pshaw, I say. The best part of making this by myself was that there was no one to chastise me for picking around the edges of the granola while it was still warm. Living alone for the win! (I did, of course, leave most of it alone to set. Slightly burnt and crispy edges, however, are always fair game.)

The recipe mentions substituting maple syrup for half of the molasses, which I'll definitely have to try. I'm looking forward to making this again with slightly different ingredients to see how it turns out!

Wednesday, September 15, 2010

My very favorite vegetable side dish

Lately I've been on a quest to eat healthier. Perhaps it's because my boyfriend is in med school, so I get to hear fun factoids about the human body all day, every day. Or maybe it's just because I'm getting to the point where I can't live solely on mac n' cheese and peanut butter sandwiches anymore. In any case, I've been paying a lot more attention to what I eat, and how. I've been trying to front-load my calories for the day, adding a food to breakfast and taking away a food later in the day. (Goodbye, midnight egg sammiches!) In addition, I've been trying to replace part of my lunch and dinner with vegetables. This way I don't have to completely give up tuna noodle casserole and grilled cheese sandwiches, I'm just halving the portions and filling up the rest of the way on vegetables.

Since I'm not yet at the point where I have to be really watching my sodium intake, I figure a tiny bit of soy sauce and butter on my veggies won't hurt. The absolutely most satisfying vegetable recipe I have in my repertoire actually comes from my mother's kitchen, broccoli with brown butter sauce. I started making it for myself while I was living in France, for two reasons: (1) It is absurdly easy, and I was just learning my way around the kitchen, and (2) It was easily accomplishable in my 6x8' kitchenette with two tiny electric burners and almost no counter space. These days, I love it so much that I will steal broccoli from my boy's house just so I can have my fix while he's in class. It's quite simple:

Ingredients:
Equal parts butter, soy sauce, and balsamic vinegar. (I usually do about 1 tbsp per serving, eyeballing the soy sauce and vinegar)
Some broccoli (I'm eating a small head per meal)

Put the butter in a small saucepan over medium heat. Forget about it for a few minutes. When it's nicely brown, but not burnt, take off the heat. Add the soy sauce and balsamic vinegar, and swirl it around. Avoid taking a big whiff, you will regret it.
Rinse off the broccoli head. Chop up into bite-sized florets, leaving as much stem as you wish. Put into a microwaveable bowl or dish. Pour the sauce over the broccoli, and cover the bowl with some plastic wrap (or a lid, if you're fancy.) Microwave on high for 1-2 minutes. Take out, remove plastic wrap, stir, and eat.

I have made this at least three times this week. I need to find a new equally delicious veggie recipe fast, or I'm going to risk burning myself out on it! I've probably still got some time, though. I can proudly say that I enjoyed today's serving more than the half grilled cheese sandwich it was accompanying. Hooray!